-
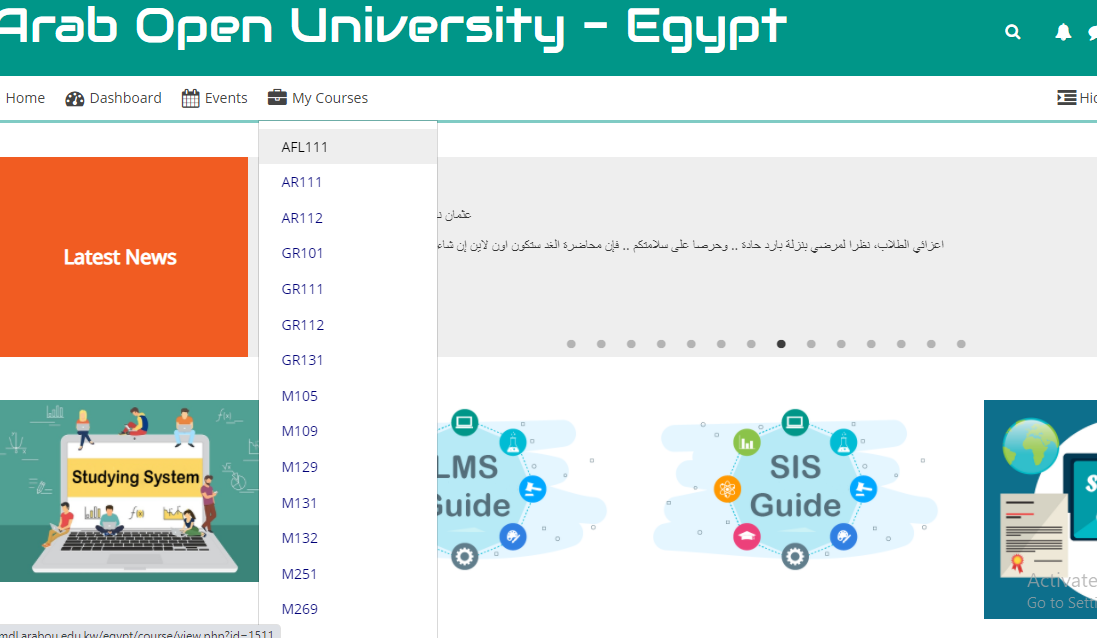
Open the desired Course from “My course” on LMS.
-
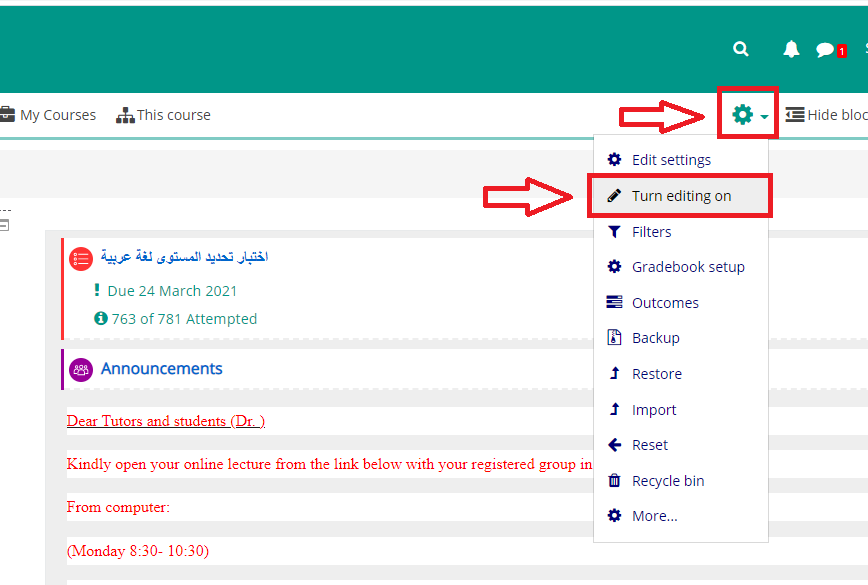
Click on “Settings” icon, then select “Turn Editing On” from drop down menu.
-
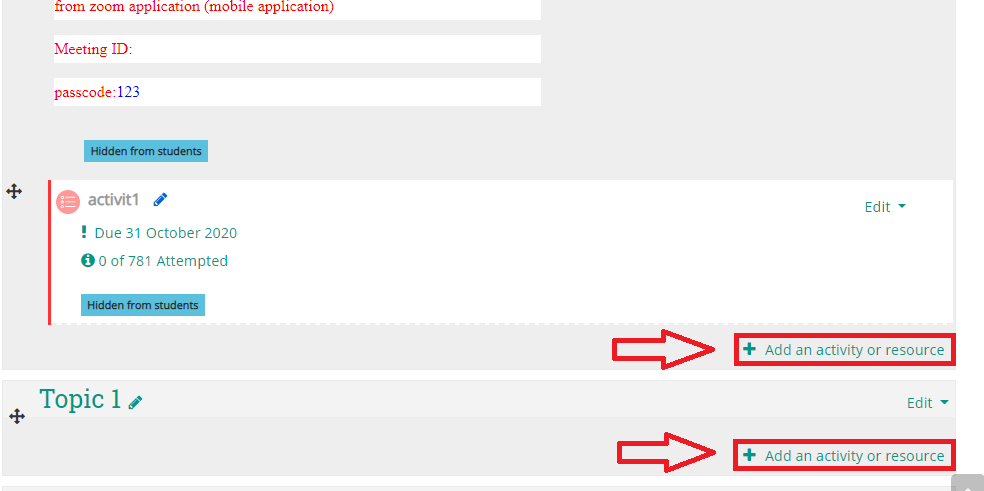
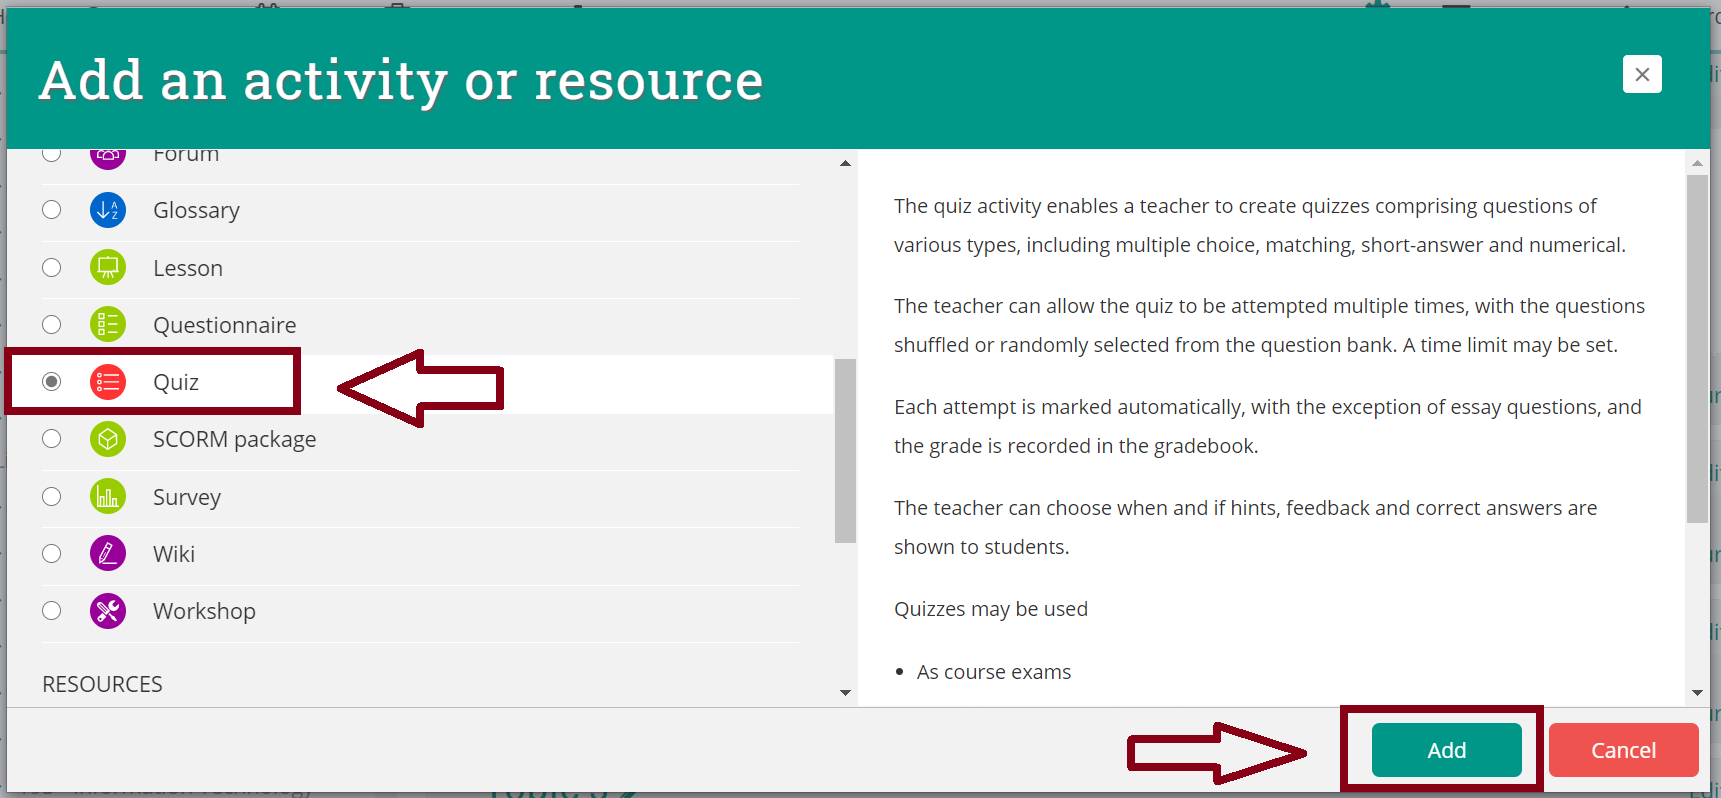
Choose the desired topic, then click on ”Add an activity or resource” below any topic.
-
Choose "Quiz", then click on "Add".
-
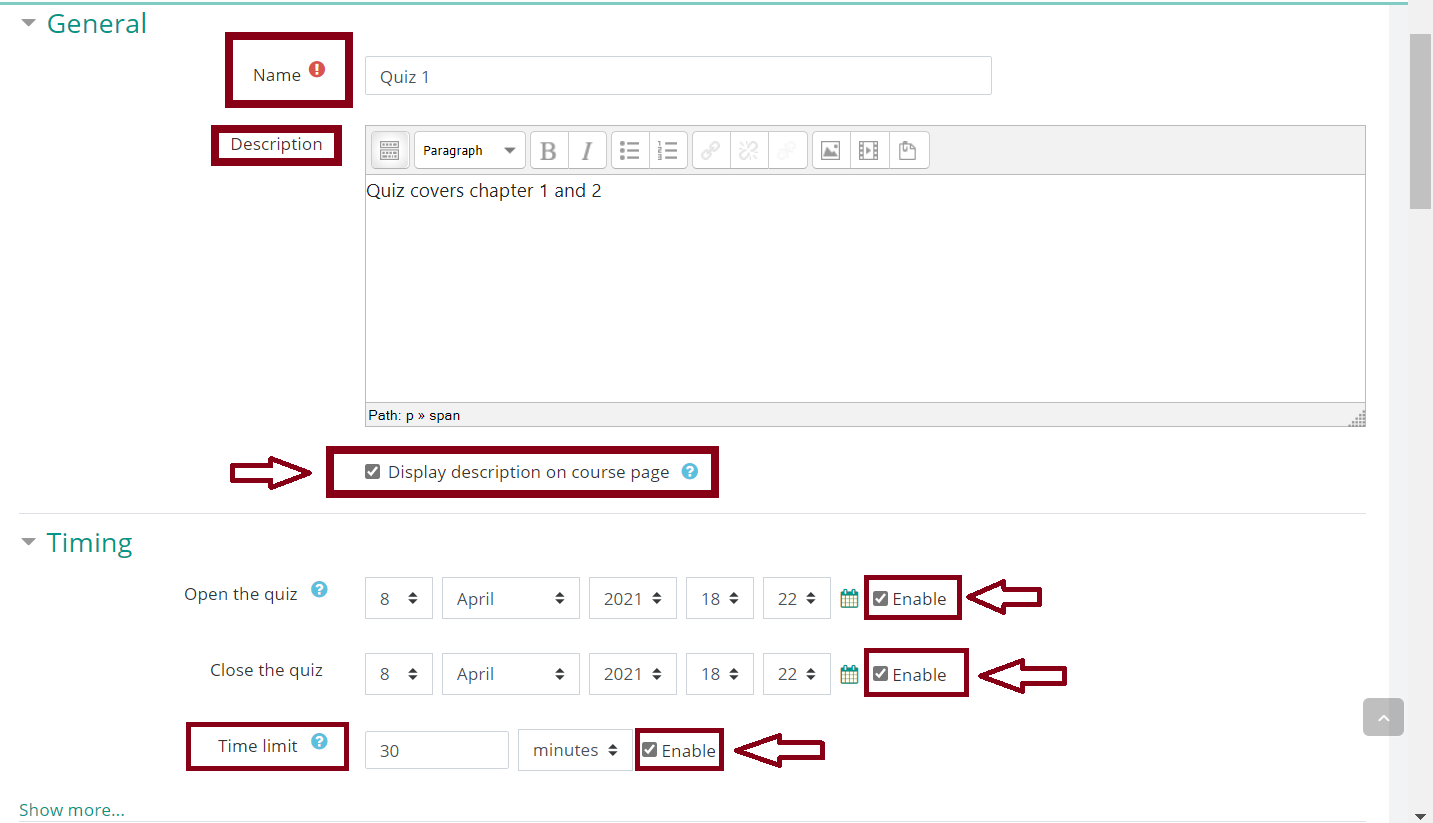
Write quiz name.
Write description.
You can click on check box "Display description on courses page".
Click on "Enable" besides "Open the quiz", then choose starting time of the duration.
Click on "Enable" besides "Close the quiz", then choose ending time of the duration.
Click on "Enable" besides "Time limit", then write time limit of the quiz, it can be less than the duration.
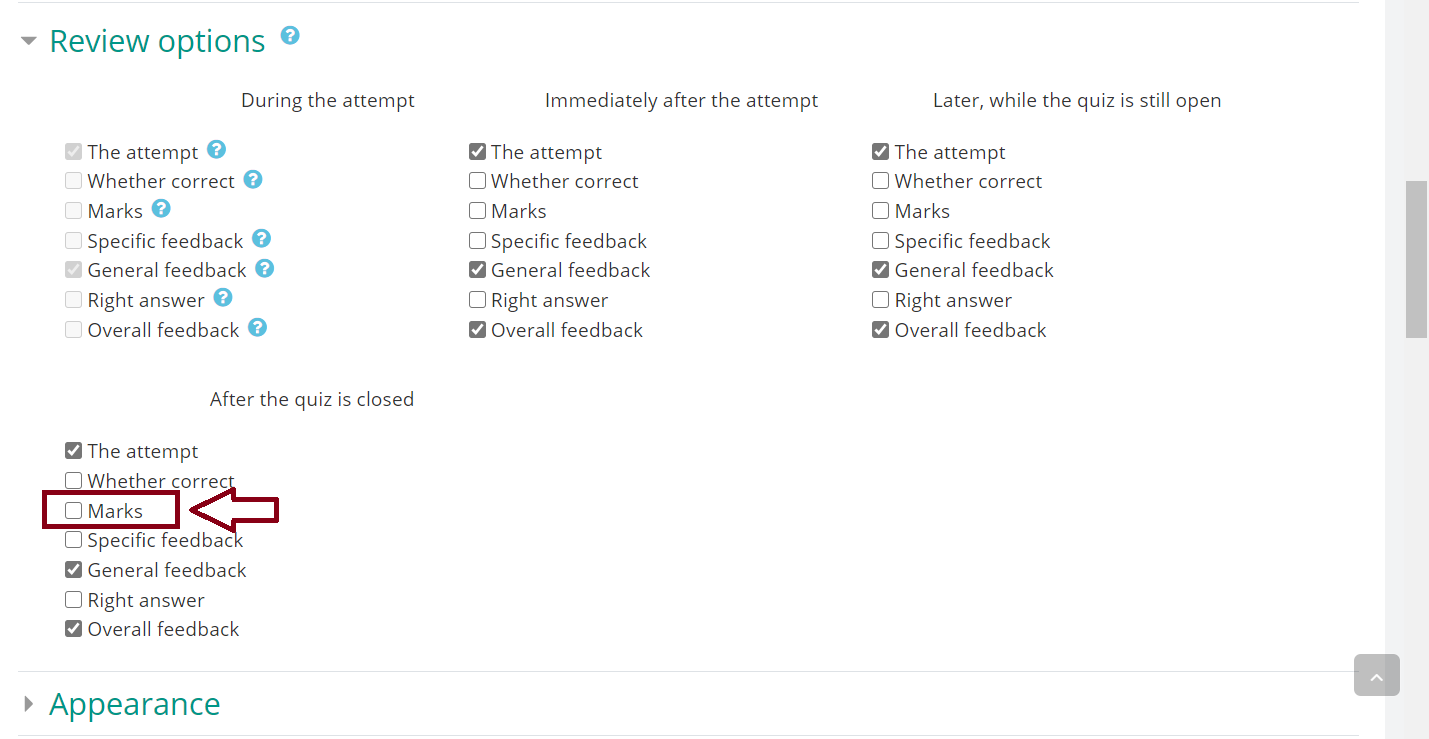
Click on "Review options" tab.
Click on "Marks" check box under "After the quiz is closed", this means that the student will see his mark after the quiz duration is closed.
-
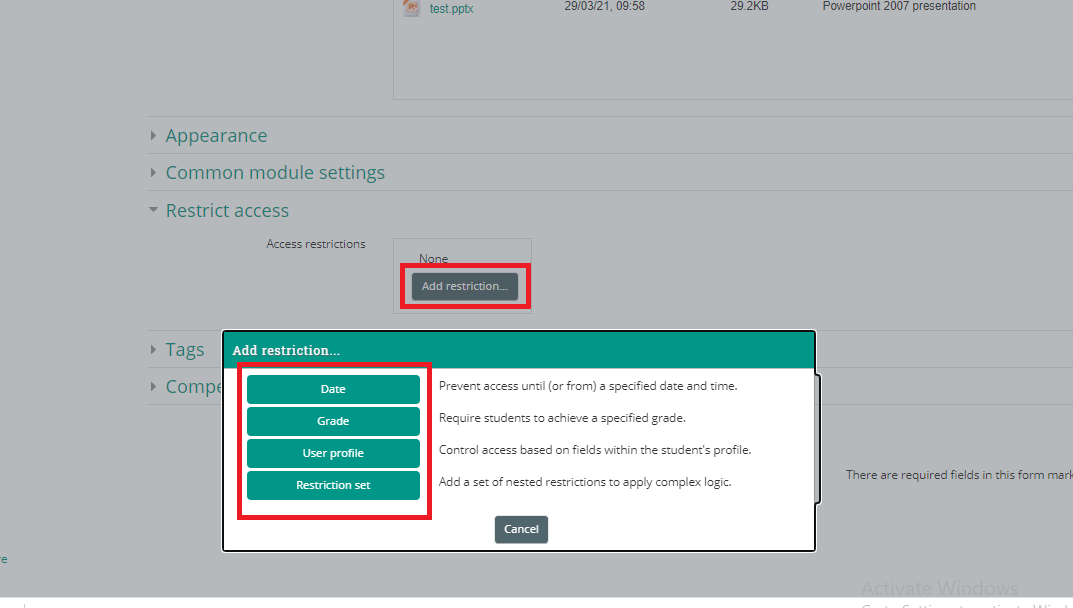
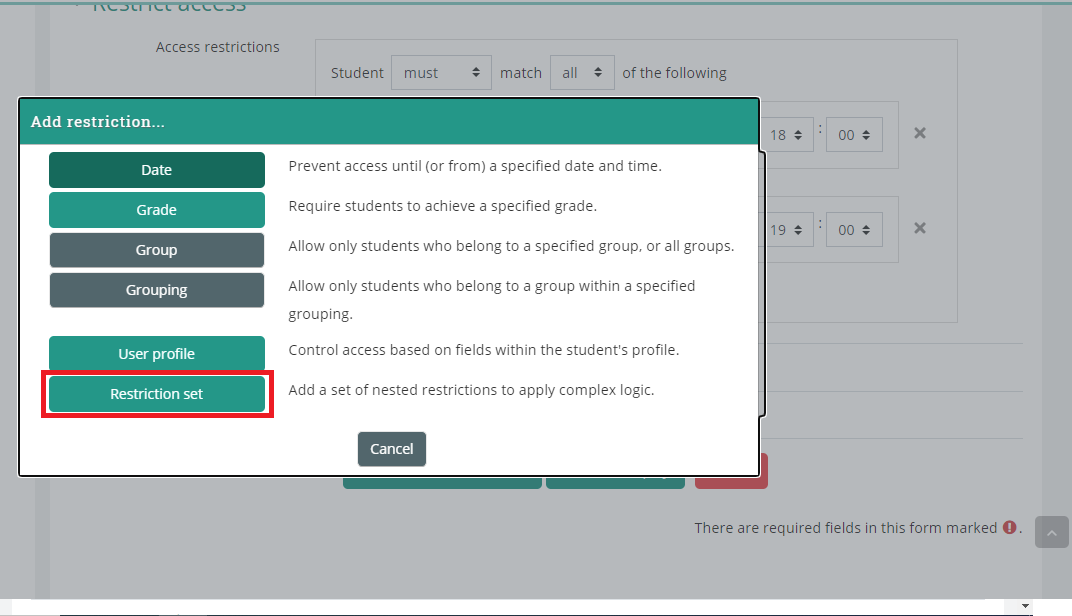
Click on "Restrict access" tab.
(this option is made to manage who can access your quiz or when to access your
quiz)
-
click on "Add restriction..."
-
then choose an option.
Restrict by date:
-
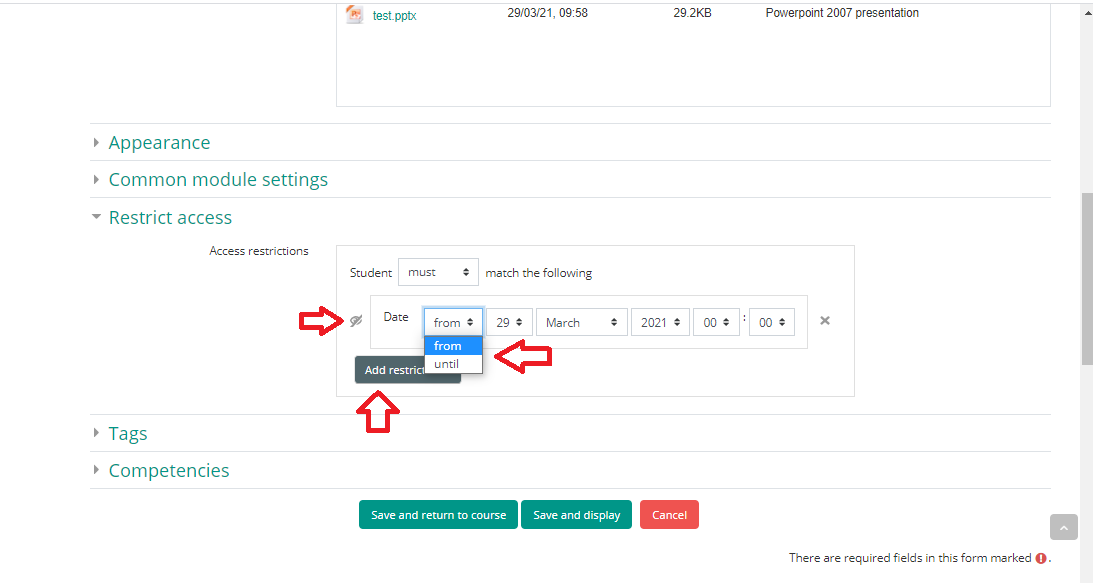
Click on "Date" if you want your label to be available from specific time or until specific time.
-
Choose "from" if you want to show your
label from specific date.
-
Choose "until" if you want to show your
label until specific date.
-
you can click on "Add restriction" again and choose "Date", it will add another date restrict access if you want to show your
label on specific time only.
-
First restriction must be "from" and other restriction must be "until".
-
you can click on
eye icon
 to hide the
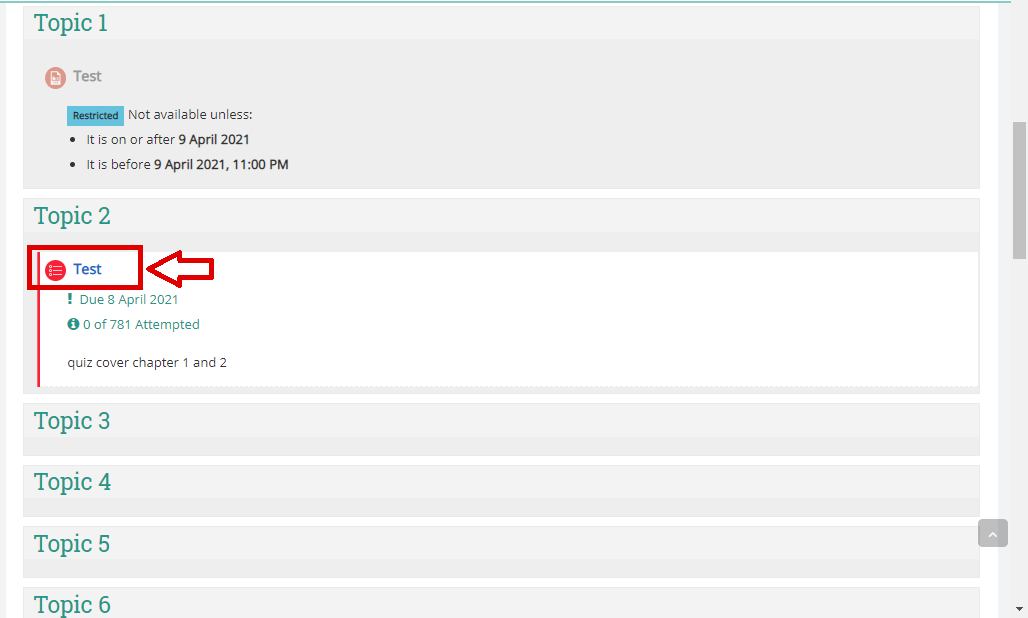
label and only show it on the selected time. (P.S. without clicking on eye icon the quiz will be shown and won't be hidden but it won't be accessible before or after the selected time.)
to hide the
label and only show it on the selected time. (P.S. without clicking on eye icon the quiz will be shown and won't be hidden but it won't be accessible before or after the selected time.)

Restrict by group:
-
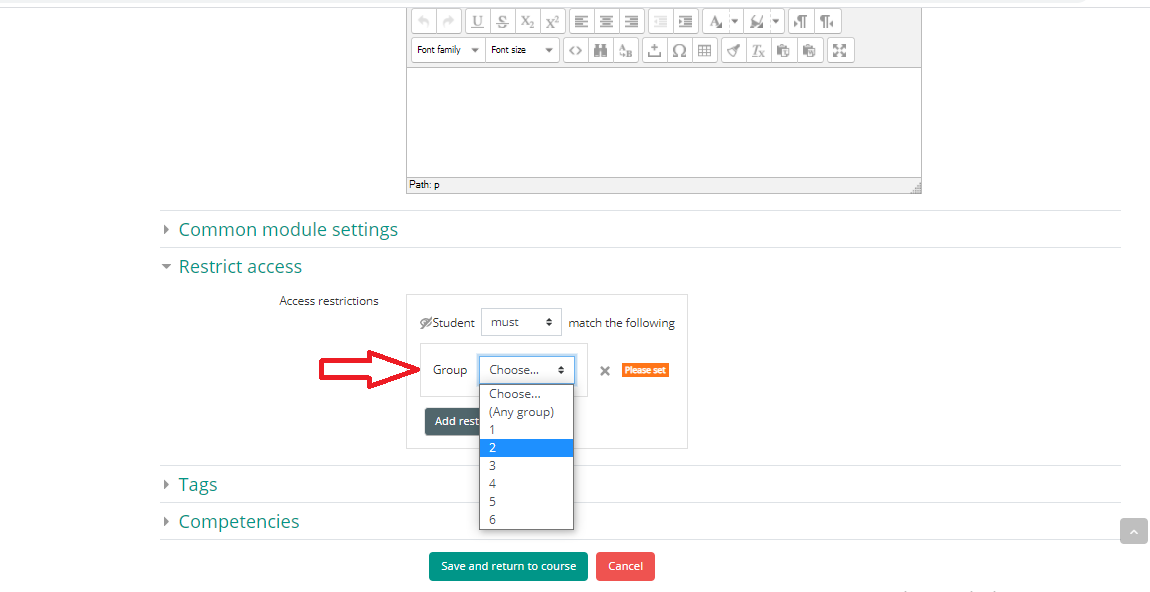
Click on "Add restriction...", then click on "Group".

-
Select the desired group and click on eye icon to hide the
label from anyone not in the selected group, if you don't click on the eye icon the
label will be shown to everyone but only accessible for the selected group.
-
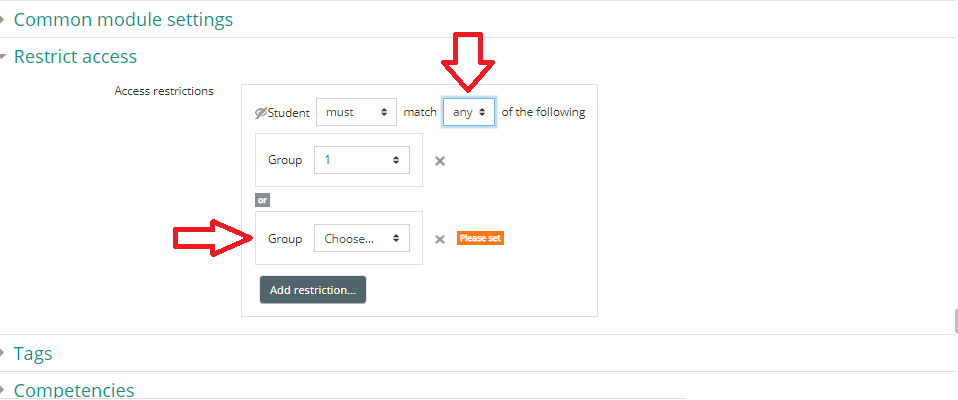
you can add multiple groups by clicking on "Add restriction..." again and select "Group", then choose another group. (Can be done many times)
-
Student must match "any" not "all", any means a
label be shown and accessible to any student in group x
or group y
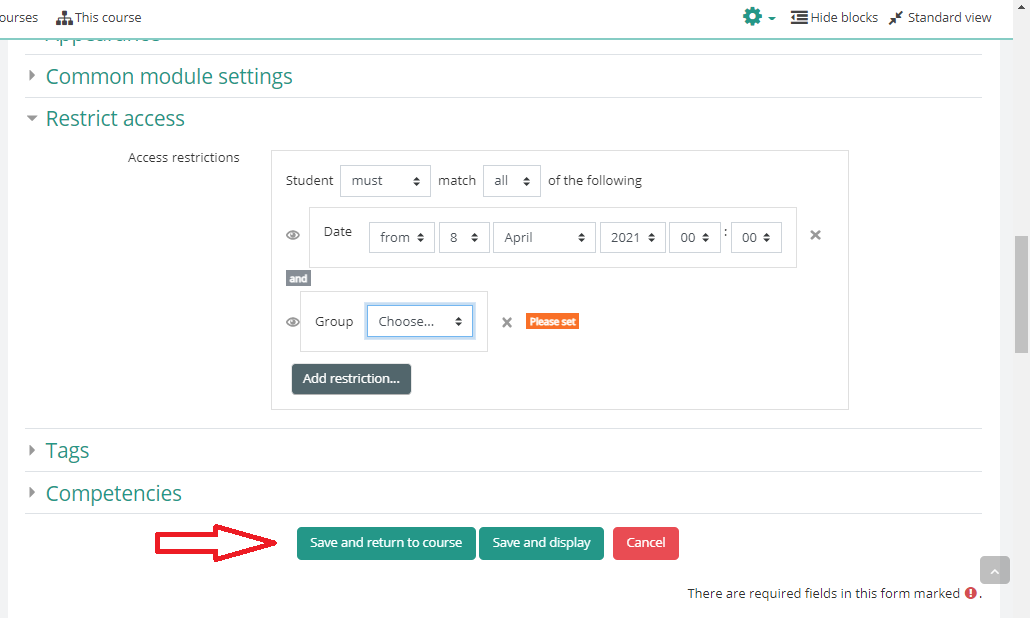
Restrict access by Date and Group: -
Click on "Add restriction...", then click on "Date" and choose the desired time.
-
Click on "Add restriction..." again, then click on "group" and choose the desired group.
-
in this case, Student must match "All" not "any" and this mean the
label will be available to any student in group x
and
in the selected time, and so on.

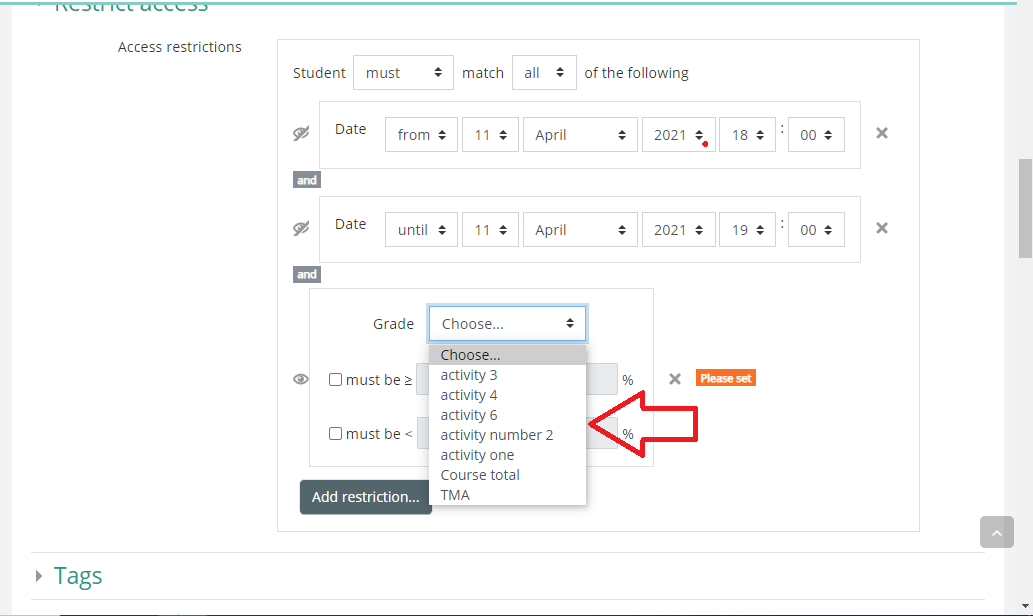
- Restrict access by Grade:
Click on "Add restriction...".
if you want to restrict access by a specific grade of specific activity or quiz, click on "Grade".
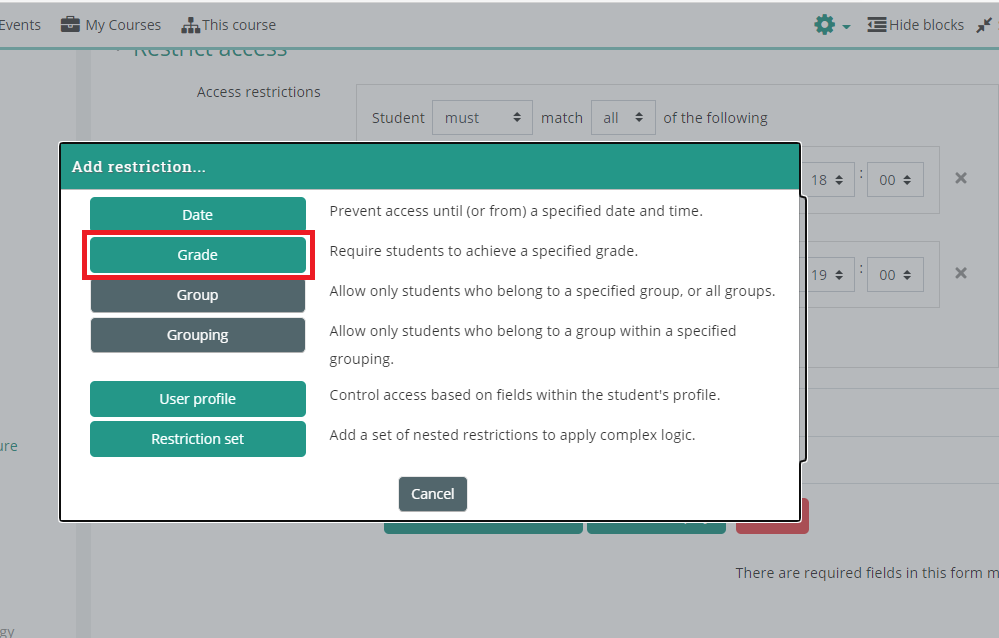
if you want to restrict access by multiple activities or quizzes, Click on "Restriction set".
Click on the upper
"Add restriction..." button, if you choose "Restriction set" then click on "Grade".
Click on "Choose...", then choose the desired activity or quiz from the drop down menu.
-
Enable "must be ≥" and write the
grade if you want to make the access for everyone whose grade is more than or equal to the typed grade.
Enable "must be < " and write the grade if you want to make the access for everyone whose grade is less than to the typed grade.
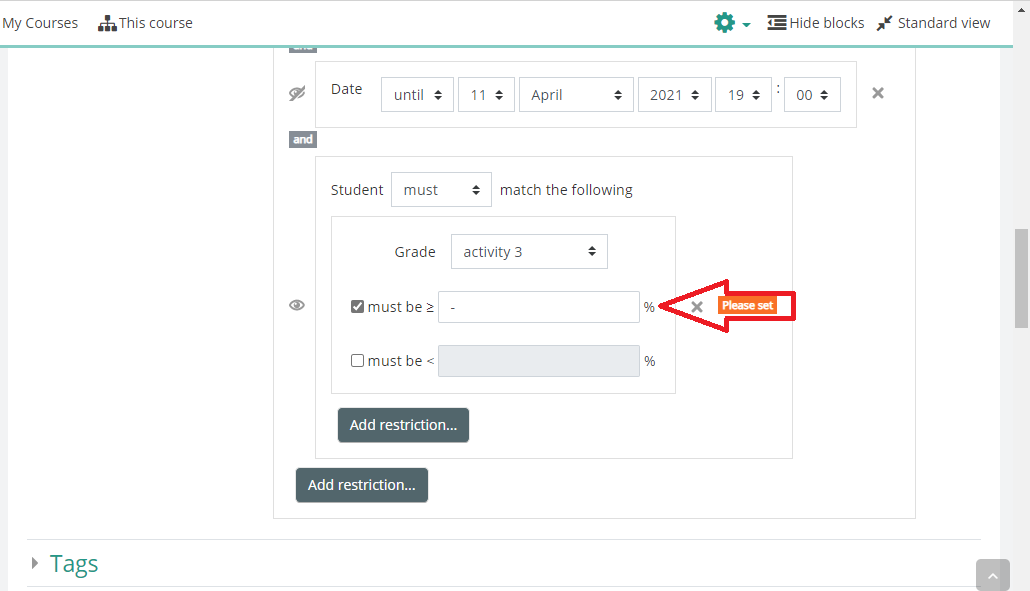
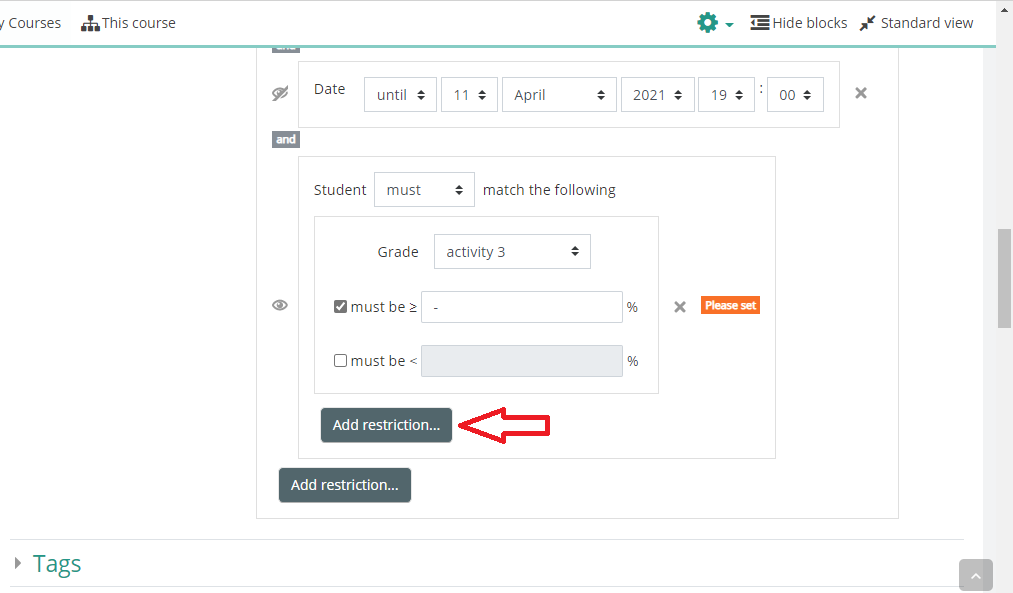
Click on upper "Add restriction..." to add more grade restrict accesses.
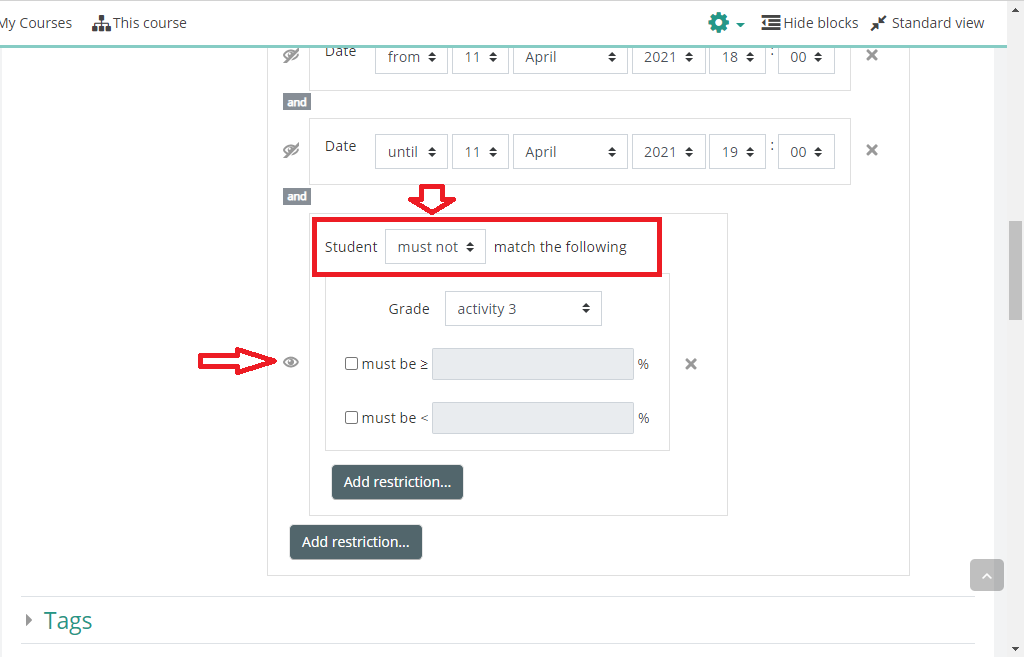
in case you want to only let the students who didn't attempted an activity or quiz
Change "Must" to "Must not", and leave grades blank, and this will give an access to every student who has no grade in the selected activity or quiz.
don't forget to click on the eye icon to hide the quiz unless restriction is true.
-
Lastly after you finish, click on "Save and return to course".
-
Click on the quiz you just created.
-
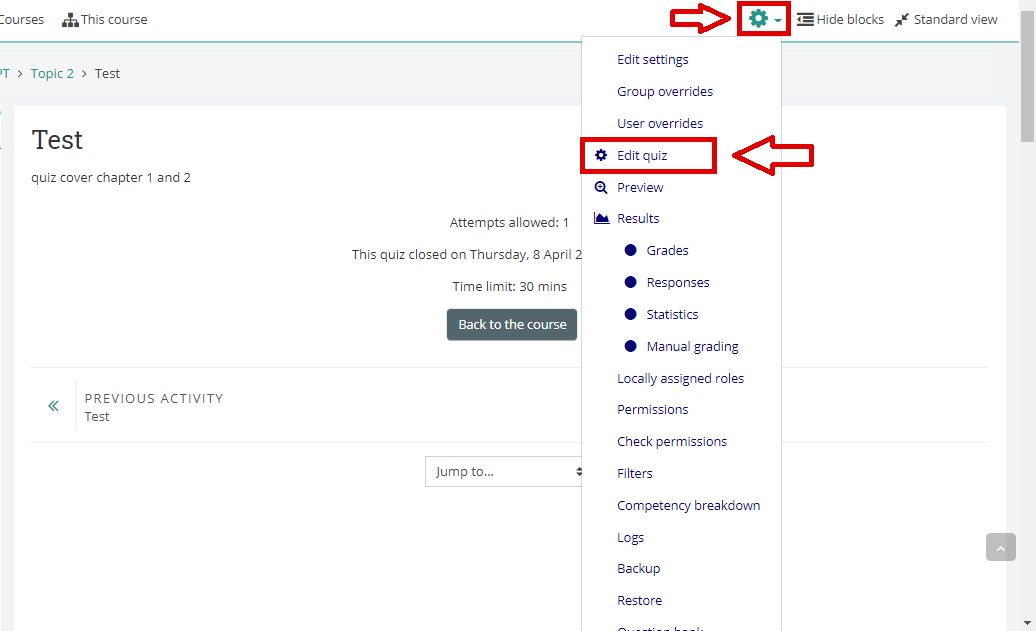
Click on "Settings" icon, then click on "Edit quiz" from drop down menu.
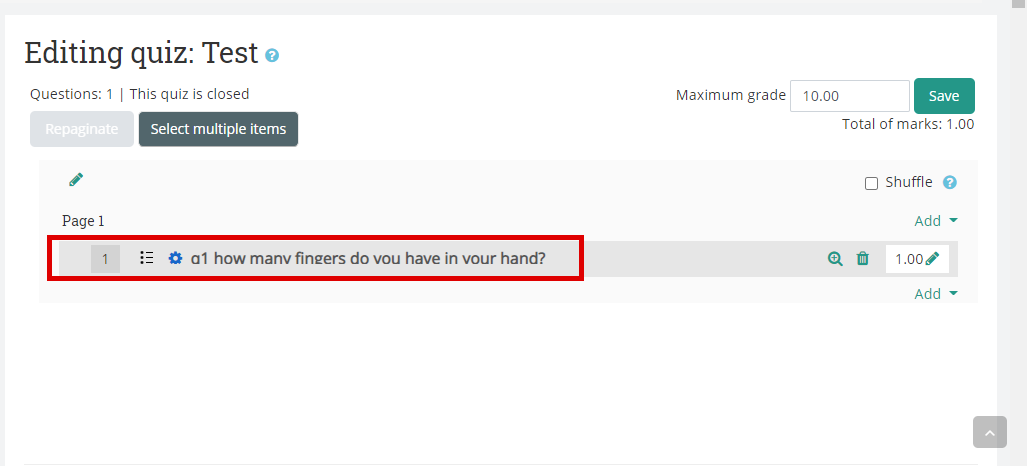
You can write the maximum grade then click on "Save".
Click on "Add" to expand, then choose "a new question" from drop down menu.
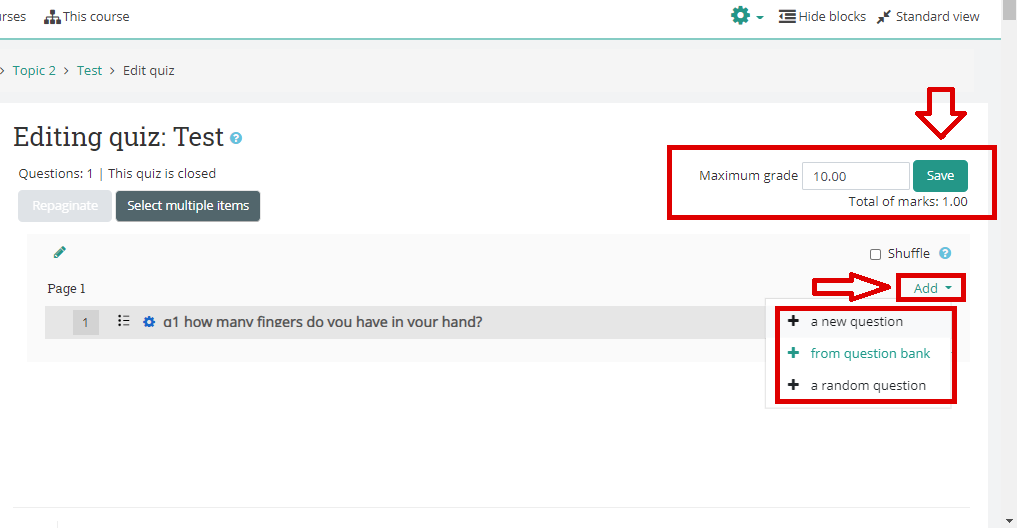
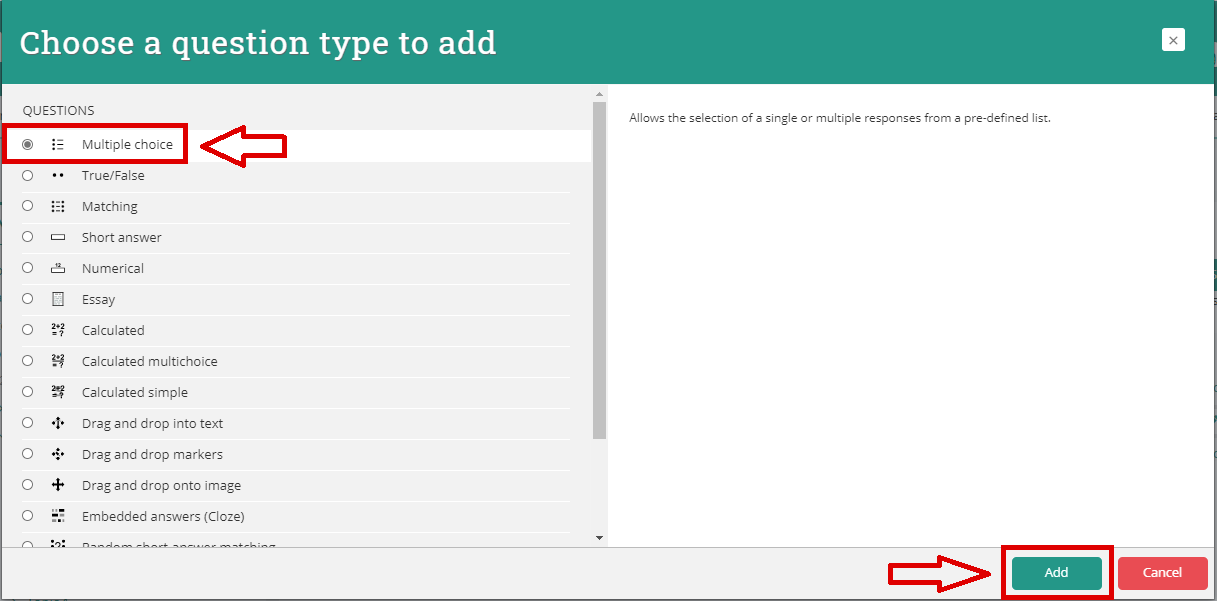
You can choose any type you want. For example, ‘Multiple choice’.
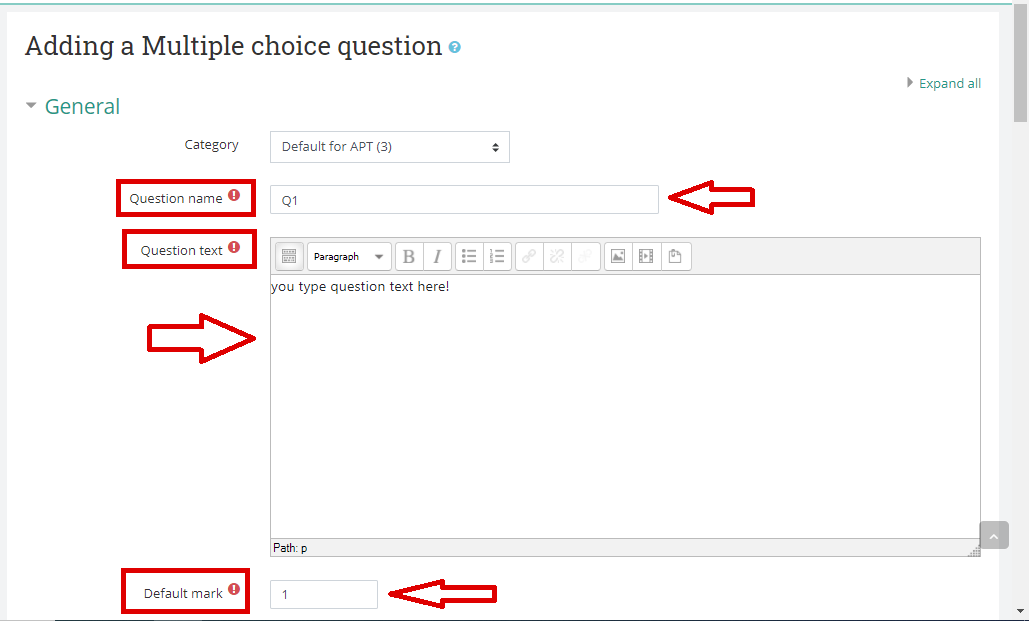
Write question name.
Write the question in "Question text".
Edit "Default mark" or leave it as default.
Write Question's Choices in
Choice 1,
Choice 2... and so on.
Below each choice you will find "Grade", Choose "100%" only for correct answer.
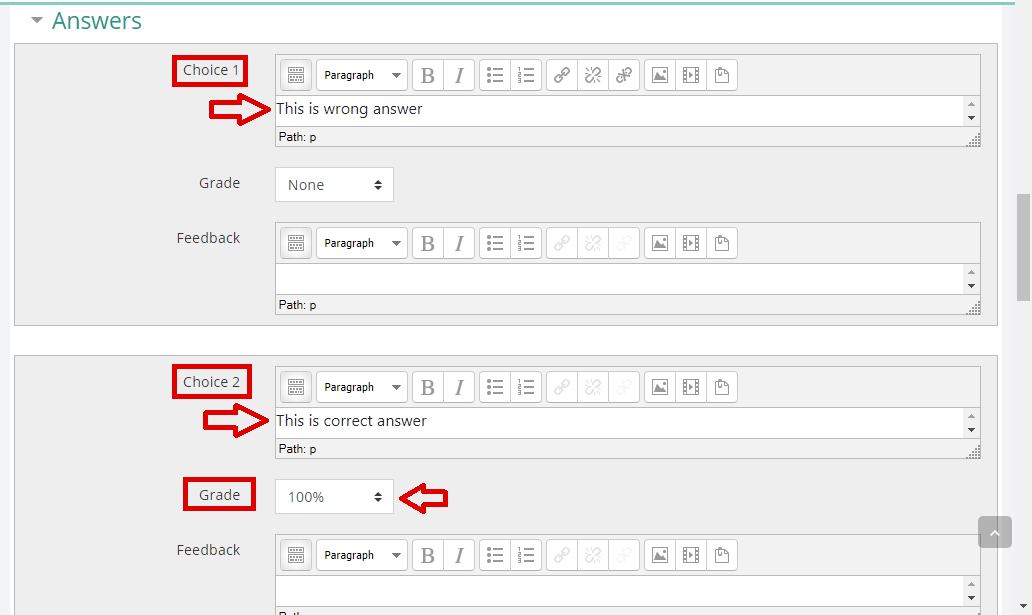
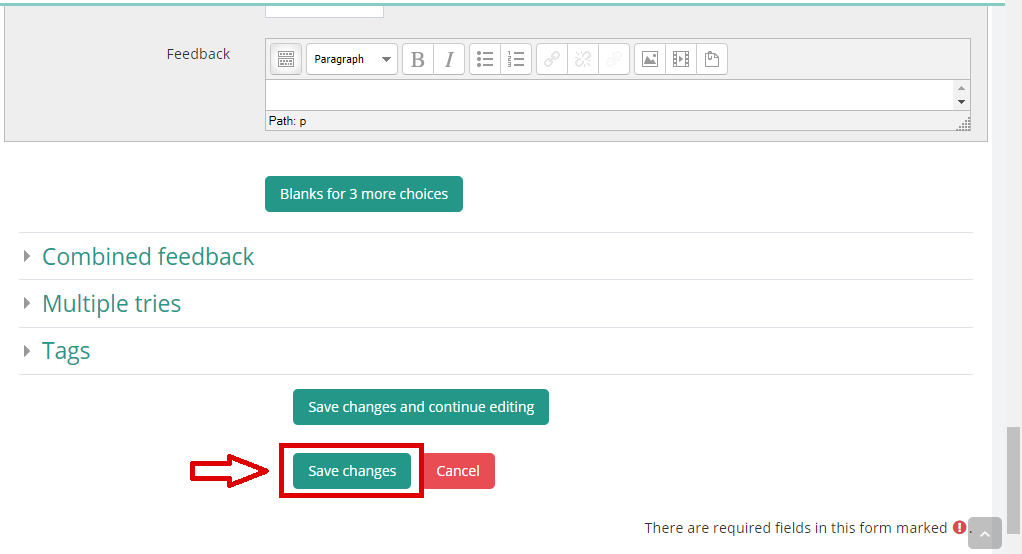
Lastly after you finish click on "Save changes".
Now your question is successfully added to the quiz.
Repeat from step 33 to add another questions.